Ah! These were so scary to tackle! Ha ha. I was really nervous when I got this order, because I really respect Dali's work. I even visited his home in Spain which has been converted into a museum. It was amazing! Now that the order is complete, I'm glad that I decided to go for it. It's nice to see that I didn't totally fail. ha ha. I hope you like them! I had fun painting them, and the customer was wayyy happy. :)
Search This Blog
Sunday, August 15, 2010
Persistence of Memory Shoes
Day of the Dead Shoes
A good friend of mine was looking through our photo albums on Facebook and fell in love with a pair of Day of the Dead Skull shoes that my brother painted a while back. I usually don't duplicate designs we've done in the past, but since the design was new to me, I decided to give it a shot. I'm glad I did! They were intricate and difficult to paint. Ha ha. But, I felt satisfied with how they came out after the tedious hours of painting.
I thought the quotation she chose was a nice finishing touch for the shoes.
I've gotten some nice comments about them on the Facebook page. What do you think?
Vans-Gogh: Hand-Painted EVERYTHING!
I recently got an order for a backpack and I am soooo excited to be branching out into more than just shoes. I absolutely love the design that she chose too! Ha ha. It was cupcakes! Loooooooove. She was happy with how it came out, and I had some much fun painting the cute, colorful cupcakes. :)
Hopefully more people will want backpacks, purses, etc in the future! Would you be interested?
Tuesday, August 10, 2010
Banana Peanut Butter Chocolate Chip Cookies
These were pretty delish. I didn't get any pictures because they got scarfed down immediately. ha ha. They were deceiving in their appearances. They looked like regular chocolate chip cookies but then you got a subtle slap of peanut butter and banana. :)
1/2 cup all-purpose flour
3/4 cups
1/2 teaspoon baking powder
3/4 teaspoon baking soda
1/4 teaspoon salt
1/2 cup Smart Balance 50/50 Olive Oil Blend
1/2 cup Smart Balance peanut butter
1/2 cup sugar
1/2 cup brown sugar
1 ripe banana, mashed
1 cup Dark Chocolate Chips
Preheat oven to 375 degrees.
1) Sift together flour, baking powder, soda, and salt.
2) Mix Smart Balance, sugars, and peanut butter until creamy.
3) Add mashed banana and the flour mixture. Blend well.
4) Mix in chocolate chips.
4) Place on sprayed cookie sheet and bake until golden brown (about 12 minutes).
Thursday, July 29, 2010
Handbags for Hope
One of my lovely customers referred me to this wonderful charity auction hosted by the South Carolina Ovarian Cancer Foundation. The Fourth Annual Purse Auction for Handbags for Hope will take place on Sept 23, 2010. I was honored to be asked to paint a bag for the auction. This was my contribution to the cause.
I also donated one of my Bagazine purses.
If any one is interested in donating a purse, the deadline is August 12. Visit Handbags for Hope for more information on the charity event and on purse donations.
Please help this wonderful cause!
Monday, July 26, 2010
Dark Chocolate Brownies with Salted Caramel
It's pretty common knowledge that I am obsessed with the Food Network. Ha ha. When I was watching the salt episode of "The Best Thing I Ever Ate" I was really intrigued by the Salted Caramel Brownies. I forgot about them until my mom reminded me yesterday and I knew I had to try to make them. They came out rich and sweet and salty and chocolatey and delicioussss. :)
Dark Chocolate Brownies Recipe adapted from Fudge Brownies "Let Them Eat Cake" by Susan Purdy
1/4 cup (1/2 stick) 50/50 Olive Oil Smart Balance, cut up
1 ounce dark chocolate chips
1 cup minus 2 tablespoons all-purpose flour
1/2 cup unsifted unsweetened cocoa powder
1/4 teaspoon baking powder
1/4 teaspoon salt
1/8 teaspoon ground cinnamon
Generous pinch of ground nutmeg
1 cup granulated sugar
2 large eggs
1 tablespoon rum
3 tablespoons vanilla soymilk
Directions
1) Position a rack in the center of the oven and preheat the oven to 350 degrees. Lightly coat a baking pan with cooking spray.
2) In a small saucepan, combine the butter and chocolate chips and set over very low heat, stirring until melted.
3) In a medium-sized mixing bowl, whisk together the flour, cocoa, baking powder, salt, cinnamon, and nutmeg.
4) Measure the sugar into a seperate large bowl of an electric mixer and beat in the cooled butter-chocolate mixture. Add the eggs, rum, and soymilk and beat well. Add the dry ingredients and mix on low speed just until blended. Don't overbeat. The batter will be thick.
5) Spoon half of the batter into the prepared pan and smooth the layer evenly. Pour on a layer of salted caramel (recipe follows). Cover with the last layer of brownie batter, smooth, and then bake for 20 to 25 minutes.
6) When done, the top will look dry and a wooden pick inserted near the edge will come out with a few crumbs but the center will look slightly gooey. Cool in the pan and cut into squares.
Salted Caramel Recipe adapted from Tyler Florence's Salted Caramel Sauce
(This makes about double what I needed to fill the brownies, so halve it if you don't want leftover caramel)
1 cup sugar
1/4 cup water
1/2 stick 50/50 Olive Oil Smart Balance Blend
2 teaspoons kosher salt
1 cup vanilla soymilk
Directions
1) Combine sugar and water to a small saucepan and set over medium-high heat. Stir until the sugar has dissolved and the caramel reaches a dark amber stage.
2) Remove from heat and stir in SB, soymilk, and salt.
My Recent Shoe Adventures
For a blog named after my shoes, I have been neglecting to post about them recently! Ha ha. Oh well. Here it goes... I recently painted a pair of beautiful butterfly shoes for an old friend of mine. They were rough but sweet... cute but tough. Ha ha. I really like how they came out, but, unfortunately the photos didn't quite do them justice...
I also painted a pair of Comedy & Tragedy shoes that I was also pretty pleased with. I added in a quotation on the sides from Judy Garland, his favorite actress. I think the colors pop really well, and even the tragedy side makes me smile. ha ha.
What do you think of these new shoes?
I also painted a pair of Comedy & Tragedy shoes that I was also pretty pleased with. I added in a quotation on the sides from Judy Garland, his favorite actress. I think the colors pop really well, and even the tragedy side makes me smile. ha ha.
What do you think of these new shoes?
Tuesday, July 20, 2010
"My Sweet" Mango Muffins with Dulce de Leche Drizzle Recipe
Mango Cupcakes Recipe adapted from Earth Vegan and a little from Allrecipes
I need these "My Sweet" in honor of my friend Row. It's a silly nickname we have for each other... But, she's sweet and exotic just like this mango muffins, so it seemed fitting. Ha ha. Right when I finished preparing the batter, I had an emergency and had to leave the batter unbaked on my countertop for a few hours and then in the fridge overnight. I think that is why they came out dense and bready like a muffin when I originally intended for them to be cupcakes. Oh well. The way I baked them, they were like muffins at room temperature and like bread pudding from the fridge. Still mango-y and delicious.
1 1/2 cups wheat flour
2 tsp baking powder
1/2 tsp salt
1 tsp cardamom powder
3 small mangoes very ripe, peeled and chopped into little bits (or if they're super ripe like mine they'll just fall apart into bits of juicy goodness mostly on their own)
zest of 1 orange
1 tablespoon fresh orange juice
2 teaspoons vanilla
2 eggs
1 cup soy milk
Directions:
1) Sift together dry ingredients.
2) In a seperate bowl beat together mangoes, OJ, zest, eggs, and vanilla.
3) Alternate adding flour mixture and soymilk until all has been combined.
4) Spoon into muffin pan lined with cupcake papers and bake in a 350 degree oven for about 10-15 minutes.
Check out my previous post: "Happy Birthday to Me" for the Dulce de Leche recipe.
Friday, July 16, 2010
Happy Birthday to Me
Yes, I made my own birthday cake... Ha ha. I wanted to. The cake had to be special, exotic, and intriguing. So, I made a chocolate cake spiked with cinnamon and chili powder. Then I drizzled it with homemade dulce de leche and covered it with chocolate ganache and topped it with homemade candied orange peel.
Mexican Chocolate Cake heavily adapted from Sara Campbell
2 1/2 cups sugar
3/4 cup unsweetened apple sauce
1 1/4 cup whole wheat flour
1 cup soy flour
1/4 cup all-purpose flour
2 1/4 teaspoons baking powder
2 1/4 teaspoons baking soda
1 1/2 teaspoons salt
1 1/2 teaspoons cinnamon
1 teaspoon chili powder
1 tablespoon vanilla extract
1 1/4 cups soymilk
1 1/2 cups water
1 1/8 cups cocoa powder
Directions
1) Preheat the oven to 350 degrees F. Spray cake pans with baking spray and place mini cupcakes paper in 12-cup cupcake pan.
2) In the bowl of an electric mixer, combine the sugar and apple sauce. Turn on the mixer to a low speed and mix in the eggs.
3) Sift together the flours, baking powder, soda, salt, cinnamon, and chili powder in a separate bowl. Set this mixture aside.
4) In another small bowl, mix the vanilla into the milk and set this aside as well.
5) To the egg mixture, alternately add the flour mixture and the milk mixture beginning and ending with flour.
6) Bring the water to a boil and pour over the cocoa and whisk it until it is smooth. With the mixture at a low speed add the cocoa. Scrape down the sides of the bowl and pour this mixture into the prepared cake pans.
7) Bake the cupcakes for approximately 15 minutes and the cakes for about 25 minutes or until tester comes out clean.
Dulce de Leche loosely adapted from KitchenBismarckrecipes
2 cups 2% milk
1 1/4 cup sugar
1 teaspoon vanilla
1 teaspoon cinnamon
1/2 teaspoon baking soda
1) Combine all the ingredients in a large, heavy saucepan and bring to a boil over high heat, stirring to dissolve the sugar. Reduce the heat to medium and simmer the mixture briskly, stirring often with a wooden spoon, until thick, caramel colored, and reduced by half, 30 to 40 minutes. Watch it so it doesn't overboil! Mine did and it was a messss. :(
2) I poured some straight off the stovetop onto the cake layers so it would drip through and permeate the cake. There was plenty left over, and if you don't overboil yours out of the pot, you should have even more. Just stick it in the refrigerator.
Candied Orange Peel adapted from Giada
1 large navel orange
3/4 cup sugar
1/2 cup water
1) Peel orange with vegetable peeler from end to end to make long strips.
2) Place peel in small saucepan and cover with water. Bring water to boil for about 1 minute. Drain and rinse peels in cold water. Repeat process 2 more times.
3) Stir the sugar and 1/2 cup of fresh water in the small saucepan over medium-high heat until the sugar dissolves. Bring to a boil. Add the orange peels and simmer over medium-low heat until tender, about 15 minutes.
4) Using tongs, transfer the peels to a sheet of parchment paper, sprinkle with sugar, twist into pretty shapes and allow to dry slightly, about 1 hour.
Sunday, July 11, 2010
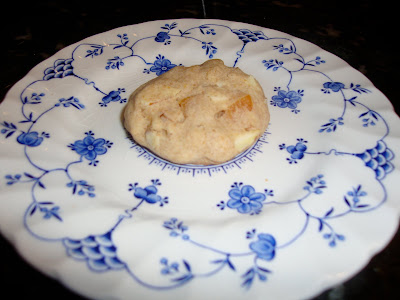
Apricot Nut Cookies
These cookies were adapted from a recipe by Giada. I like them a lot. Sweet, but not overly. Fruity, nutty, soft, and delicious. What more can I say?
1 cup (2 sticks) 50/50 smart balance blend, at room temperature
1 cup sugar
2 teaspoons pure vanilla extract
1/2 teaspoon ground cinnamon
1/2 teaspoon fine sea salt
2 large eggs
1 1/2 cups all-purpose flour
1 cup whole wheat flour
2 cups dried apricots, coarsely chopped
1/2 cup slivered almonds, toasted
2 tablespoons pine nuts, toasted (it should have been more... but, I burned about 4 tablespoons when trying to toast them. So, maybe use 4 tablespoons if you have them)
Directions:
1) In a large bowl, beat the butter, sugar, vanilla, cinnamon, and salt with an electric mixer until light and fluffy, about 2 minutes. Beat in the egg. Stir in the flour until just blended. Mix in the apricots, almonds, and pine nuts.
2) Form small flattened cookie dough balls and arrange on parchment paper covered cookie sheet.
3) Bake in a 350 degree oven for about 15 minutes.
Friday, July 9, 2010
Chocolate-Chocolate-ChocolateChip Cupcakes
In continuing with my love of all things small, cute, and baked, I made these with my little cousin today. These are still in the experimental phase. They came out okay, but not incredible yet. I'll have to try them again sometime and play with them a little bit more. But, I thought they were worth sharing because my family still liked them. :)
Chocolate Chocolate Chip Cupcake Batter
1 cup whole wheat flour
1/2 cup all-purpose flour
1 1/2 teaspoons baking powder
about 1/2 cup cocoa powder
1/2 teaspoon salt
1/2 cup apple sauce
3/4 cup low-fat vanilla yogurt
1 cup white sugar
3 eggs
1 teaspoon vanilla
1/2 cup organic soy milk
about 1 cup semi-sweet chocolate chips
Directions
1) Preheat oven to 350 degrees. Line muffin pan with paper liners (I might try foil ones next time because these kind of stuck due to the lack of any grease in the cupcakes). In a medium bowl, whisk together flour, sugar, baking powder, cocoa powder, and salt.
2) In separate bowl, beat together apple sauce & yogurt. Mix in eggs & vanilla. Alternate adding in flour mixture and soymilk.
3) Dividing evenly, spoon batter into cups. Bake until a toothpick inserted in center of a cupcake comes out clean, about 15 minutes.
4) Let cool and top with ganache.
_____________________________________________
Chocolate Ganache (I used some that was left over from the Banana Cupcakes)
1 Bar Ghirardelli Semi-Sweet Chocolate + 1 Package Baking Chocolate
3/4 cup Light Soy Milk
Directions
1) Melt chocolate on double boiler, stirring constantly.
2) Warm milk in microwave 30 seconds.
3) Stir milk slowly into chocolate until smooth.
4) Drizzle a little chocolate goodness on top of cupcakes
Tuesday, June 29, 2010
Everyfruit Cupcakes
OH MY GOD! I ALMOST DIED THEY'RE SO GOOD! Ha ha.
Now that I got that out there...
When I came up with the idea to make these, I thought it was surely going to be too much going on. I was sooooo wrong. They are perfect, with or without the lime glaze. The citrus in every part ties it all together really well. And, while these aren't the healthiest thing I've baked as of late... They were the most delicious! My dad gobbled down three at once and my mom literally licked her plate clean (it was kinda ridiculous). I want to eat at least a thousand of these right now... at least. Ha ha.
The best part was eating these cupcakes while watching Cupcake Wars on food network. Ha ha. So fun.
And, since facebook feedback seemed about equal between cake and tarts... I made extra blueberry filling to use in a Peach-Blueberry Tart that I plan to make in the next few days. :)
Blueberry Filling
1/2 cup water
1/2 cup plus 1 tablespoon orange juice
1 teaspoon orange zest
1 pint blueberries
2 tablespoons plus 1 teaspoon turbinado sugar
2 1/2 teaspoons cornstarch
Orange Cupcake Batter
1 cup all-purpose flour
1/2 cup whole wheat flour
1/2 cup soy flour
1 1/2 teaspoons baking powder
1/2 teaspoon salt
1 stick Smart Balance 50/50 Blend
1 1/2 cups sugar
4 eggs
2/3 cups vanilla yogurt
1/3 cup light soymilk
1/4 teaspoon lemon extract
1/2 cup orange juice
1 teaspoon orange zest
Lime Glaze
Zest of 1 small lime
Juice of two small limes
About 3 cups of powdered sugar
To prepare the Blueberry Filling:
1) Bring water and 1/2 cup OJ to a boil on medium heat.
2) Add orange zest, blueberries, and sugar and allow to simmer on medium heat for about 10 minutes. I was terrible about keeping track of how long it was really there, but that sounds about right.
3) Mix cornstarch into remaining 1 tablespoon OJ until it is completely smooth and dissolved.
4) Slowly stir cornstarch mixture into blueberries.
5) Reduce heat to low and let simmer for about 25 minutes (stir every 5 minutes or so).
6) I had to raise the heat back to medium for a bit to thicken up... But, basically, just watch the blueberries and when they've reached a thick, almost jelly like consistency, remove the filling from the heat.
To prepare Orange Batter:
Preheat Oven to 350*
1) Sift together dry ingredients.
2) In a separate bowl, beat together Smart Balance and sugar until smooth.
3) Beat in eggs one at a time.
4) Alternate adding flour mixture and yogurt/soymilk a little bit at a time.
5) Add in extract, OJ, and zest and mix just until all ingredients have been combined.
6) Prepare cupcake pan (or cute little bundtcake-like pans like I tried to use) by spraying with non-stick baking spray or lining with cupcake papers.
7) Spoon batter into pan only about 1/3 full.
8) Spoon blueberry filling into middle on top of batter.
9) Cover blueberries with some more battery goodness.
10) Bake in the oven for 15-20 minutes.
To prepare Lime Glaze:
1) Zest lime into bowl.
2) Juice limes into the bowl (watch for seeds!)
3) Wisk in powdered sugar until smooth and sweet.
4) Drizzle over cooled cupcakes (or, as was the case with my parents and I, drizzle it on warm cupcakes... or just eat the cupcakes plain).
Now revel in the glory of these fruity treats. :)
Sunday, June 27, 2010
Strawberry Banana Muffins
I made up the recipe for the muffins as an experiment yesterday. I'm not so sure I like baking with the agave yet. I guess I haven't figured out exactly how much to use. I appreciate the lower glycemic index and etc etc that agave has to offer, but at least the brand of syrup I used wasn't all that great. Hrm.
Overall, I think these came out a little bit drier than I wanted, but everyone else liked them. I had one this morning with a little bit of Smart Balance Peanut Butter smeared on it. Pretty good. :)
Let me know if you have any ideas to make them more moist.
Strawberry Banana Muffins
1/4 cup strawberries
1 banana
2 eggs
1 cup low-fat Vanilla yogurt
1/4 cup Organic Blue Agave Syrup
1/2 teaspoon pure vanilla extract
1 teaspoon baking powder
1/2 teaspoon baking soda
1/4 teaspoon salt
1 cup whole-wheat flour (leveled)
1/2 cup organic soy flour (leveled)
1/4 cup melted smart balance 50/50 butter blend
Directions
1) Preheat oven to 350 degrees. Spray a 12-cup muffin pan with baking spray. In a medium bowl, whisk together flours, baking powder, baking soda, and salt.
2) In separate bowl, beat together strawberries & banana. Mix in eggs, vanilla yogurt, agave syrup, and vanilla. Add in flour mixture (do not overmix). Then add in melted butter and mix just until blended.
3) Dividing evenly, spoon batter into muffin pan. Bake until a toothpick inserted in center of a muffin comes out clean, 15 to 25 minutes.
Saturday, June 26, 2010
Thrift Shopping
I absolutely LOVE going thrifting. When I was in middle and high school I would go fairly often. But, I've been so busy with classes the past two years, so I haven't had much time to go thrifting in VA. It was nice to be able to go out with my friend Monica this week and visit my old thrift shop haunts. I went in search of cute clothes and purses (I came out with a shirt, a skirt, a purse, a , and a few books).
Along the way, Monica and I found some cute knick-knacks.
We also saw the most hideous designer jacket. Ha ha. Why D&G? Why?
We came across the most ridiculous corset. Ha ha.
And... we even found my name tag. ;p
It was such a fun day. I'll post pictures of the stuff I bought soon.
Along the way, Monica and I found some cute knick-knacks.
We also saw the most hideous designer jacket. Ha ha. Why D&G? Why?
We came across the most ridiculous corset. Ha ha.
And... we even found my name tag. ;p
It was such a fun day. I'll post pictures of the stuff I bought soon.
Sunday, June 20, 2010
Chocolate-dipped Peanut Butter Frosted Banana Cupcakes
Chocolate-dipped Peanut Butter Frosted Banana Cupcakes. Whoa that's a delicious mouthful! Ha ha. I wanted to bake something for Father's Day and I wanted it to be sweet and decadent, but not crazyyyy unhealthy. So, I wound up changing around a few recipes and I came up with these. :)
They are banana cupcakes topped with peanut butter buttercream and dipped in chocolate ganache. They are delish! My family all loved them. Mmmmm.
If you're interested in making them, here are the recipes:
Banana Cupcakes (adapted from: http://www.marthastewart.com/recipe/desserts_E0308WELD_T )
1 cup whole-wheat flour (leveled)
1/4 cup soy flour (leveled)
1/4 cup all-purpose flour (leveled)
1 cup sugar
1 teaspoon baking powder
1/2 teaspoon baking soda
1/4 teaspoon salt
1/2 cup (1 stick) Smart Balance 50/50 butter blend
1 1/2 cups mashed bananas (about 4 ripe bananas)
2 large eggs
1 cup Vanilla Yogurt
1/2 teaspoon pure vanilla extract
Directions
1) Preheat oven to 350 degrees. Line a standard 12-cup muffin pan with paper liners. In a medium bowl, whisk together flour, sugar, baking powder, baking soda, and salt.
2) In separate bowl, beat together butter & mashed bananas. Mix in eggs, vanilla yogurt, and vanilla. Add in flour mixture (do not overmix).
3) Dividing evenly, spoon batter into muffin cups. Bake until a toothpick inserted in center of a cupcake comes out clean, 15 to 25 minutes.
4) Once cooled, place in a freezer-safe container, where the tops of the cupcakes won't be covered.
_____________________________________________
Peanut Butter Buttercream (adapted from: http://www.recipezaar.com/recipe/Easy-Peanut-Butter-Buttercream-Frosting-172801)
1/2 cup (1 stick) Smart Balance 50/50 butter blend
Approx. 1 cup Smart Balance Peanut Butter
3/4 cup confectioners' sugar
1 pinch table salt
1/2 teaspoon vanilla extract
1 tablespoon Light Silk soy milk
Directions
1) Whip together room temperature butter & peanut butter until combined and creamy.
2) Slowly add in powdered sugar & salt and beat to combine.
3) Add in vanilla & milk and mix only until combined. (Do not overbeat the frosting!)
4) Spoon buttercream into a pastry bag with large round tip (I didn't have these available to me at the moment, so I used a ziplock bag... I spooned in the BC and then cut the tip off). Pipe the BC onto the cooled cupcakes, starting in the middle and creating round, flat circles. (This will look better underneath the ganache).
5) Place the cupcakes in the freezer to harden the BC and make it easier to dip into the chocolate ganache.
At this point, they probably look like this:
_____________________________________________
Chocolate Ganache
1 Bar Ghirardelli Semi-Sweet Chocolate + 1 Package Baking Chocolate
3/4 cup Light Soy Milk
1) Melt chocolate on double boiler, stirring constantly.
2) Warm milk in microwave 30 seconds.
3) Stir milk slowly into chocolate until smooth.
4) Dip frozen cupcakes in chocolate and let sit at room temperature until the cupcake thaws and the chocolate sets.
Aren't they cute?
Even my mom's cows liked them. Ha ha.
Do you think you'll try this recipe?
Friday, June 18, 2010
Lucky Lucky Lavender
My nails were looking busted... So, I went over to this little beauty supply shop in Downtown (really close to my dad's store) and bought OPI's Lucky Lucky Lavender from the Hong Kong collection and Ogre-the-Top from the Shrek collection. I decided to try out the LLL shade first... it looked a little more pink than lavender, but overall, I'm in love. It was a little bit thick when I was putting it on, but it dried really smooth. And, I didn't even put on a top coat, and it hasn't chipped at all in the few days I've been wearing it. Yayyyy! LLL is such a happy looking color that it makes me smile every time I catch a glimpse of it while doing everyday tasks. Ha ha.
Lucky Lucky Lavender via OPI
Ogre-the-Top via OPI
My next nail polish buy will probably be Sephora by OPI Only Gold For Me Top Coat:
via Sephora
Lucky Lucky Lavender via OPI
Ogre-the-Top via OPI
My next nail polish buy will probably be Sephora by OPI Only Gold For Me Top Coat:
via Sephora
Thursday, June 17, 2010
DIY Sunglasses
So, I've had some plain black Forever 21 sunglasses sitting around for a few months. I've been wanting to do a sunglasses redecoration project, so I decided to hot glue on a strip of gold chain laced with pleather. So easy! You should try it. They look vintage & very Chanel. ;)
I really like how they came out and I can't wait to wear them outside! For now, these are some pictures I took of myself. ha ha.
Do you like them?
I really like how they came out and I can't wait to wear them outside! For now, these are some pictures I took of myself. ha ha.
Do you like them?
Wednesday, June 16, 2010
Gabe's Graduation Party
So, my little brother just graduated from high school! My mom and I decided to make him a cake for his grad party and I was stumped at first on what to do... But, then my brother suggested "WYW" and it was perfect. ha ha. My brother's cliche of friends at school go by the name "WYW," which stands for "Wow, You Would." They made up the name to make fun of other cliches at school that took their "gang" status wayyyy too seriously. It's kind of like: "Wow, you would be that dumb." Ha ha ha. I think it's hilarious.
The cake came out cute, I think.... This was the Grad Party Tablescape. ;)
BETSEY JOHNSON MADELINE PUMPS
YESSSSSSSSSSSSSS! The Betsey Johnson Madeline Pumps in Gold & Silver are in the mail zooming over to me. I bought them wayyyyyyyy on sale! Discounted from $192 to $57. They are sold out everywhere... and on the site I bought them from (shoes.com) they happened to be the last pair... and they happened to be my size. I am sooooo excited for them to get here. I think they are absolutely beautiful.
I think they match perfectly with this Betsey Johnson quotation I found on Doe Deere's blog. :)
Let me know what you think!
I think they match perfectly with this Betsey Johnson quotation I found on Doe Deere's blog. :)
Let me know what you think!
Lavender Lipstick Obsession
So, I've been addicted to Doe Deere's blog for the past few weeks. I seriously think I've read every entry, pored over every photo shoot, and lusted over every product in her Lime Crime makeup brand. I cannot wait to purchase her D'Lilac lipstick. It is the absolute perfect shade of lavender!
http://www.limecrimemakeup.com/dlilac-opaque-lipstick-p-230.html
You should absolutely admire her every post the way I have been doing. She totally deserves it. http://www.doedeereblogazine.com/ and take a look at Lime Crime's online shop: http://www.limecrimemakeup.com/
Hooray for bold makeup! Look out for a Lime Crime photo shoot once I buy the lipstick. It will most definitely be glorioussss. :)
Another Pair of HYSTERICgirl Inspired Shoes
So, a friend of mine wanted something pretty with sunflowers and a Marilyn Monroe quotation. So, I thought.... what's prettier than Alice Le's model portraits? NOTHING. Ha ha. So I drew inspiration from own of her sketches, threw in some sunflowers, and let people know that if you: "Give a girl the right shoes she can conquer the world." Ha ha.
I love them! And, so did Olivia, my adorable customer. :)
Subscribe to:
Posts (Atom)